

Have you ever wondered why we all suddenly act as though we are experts when the holiday season arrives? You’d think after decades of doing it every year, we’d be better wrappers, especially when it comes to gifts. The funny thing is that most of us weren’t employed as professional gift wrappers at a department store, so our gift-wrapping skills are definitely lacking.
So, how to make a bow from wrapping paper?
With these simple, step-by-step instructions, anyone can quickly and easily create a bow out of wrapping paper in 3 different styles if they are running low on bows for gifts.
This post might contain affiliate links. There may be a commission earned if you purchase something after clicking on one of these links.
Table of Contents
Materials For Wrapping Paper Bows
- Wrapping Paper (Here is a great double-sided set)
- Scissors
- Stapler (I love this little one)
- Tape
- Glue Runner
- Ruler
Traditional Wrapping Paper Gift Bow
This is how to create the kind of bow you find in bulk gift bags. It’s what I consider a “traditional” gift bow.
STEP 1
First, cut three 12 inch long strips of wrapping paper at 1 inch wide.
STEP 2
Then, make 3 strips that are 11 inches long and also 1 inch wide.
STEP 3
Then, take your wrapping paper and cut three 10 inch long, 1 inch wide strips from it.
STEP 4
Take one of your longest strips of paper and gently fold one edge to the center. It ought to have the appearance of a cause ribbon.
Make sure you don’t actually press the soft fold. It should be looped rather than flat.
To make sure I knew exactly where to place the end of the paper strip, I found it was easiest to fold the strip of wrapping paper in half first.
STEP 5
Repeat the process for the other end of your bow while holding the looped end in place, then staple the ends to the center of the paper strip to keep them in place.
STEP 6
To loop and staple all of your strips together, repeat steps 4 and 5.
STEP 7
After that, start putting your bow together by using your glue runner to add a small strip of adhesive to the middle of one of your large bow loops.
STEP 8
Then press a second large bow loop to the adhesive so that it is crossing the first one to form a short “x”.
STEP 9
Add another small strip of adhesive to the center of your crossed loops and attach your last large looped paper strip so that it crosses through the largest opening of your short “x” from above. Kind of like an asterisk should be how it appears.
STEP 10
Continue adding your looped strips together with your glue runner as you did in steps 7-9 starting with the 11″ looped strips and finishing with the 10″ looped strips.
STEP 11 (OPTIONAL)
Last but not least, use your glue runner to attach a tiny 1 inch loop of wrapping paper to the middle of your bow.
I thought my bow looked fine without it, but if yours has a sizable open area in the middle, I suggest adding it. See more about How To Wrap A Bowl Easily?
Fringe Wrapping Paper Bow
A gift bow with fringe is a ton of fun and festive. It is even quicker and simpler to make than you might think (unless you use foil paper like I did).
STEP 1
First, cut a strip 6 to 8 inches wide that spans the entire height of your wrapping paper roll. The paper strip should then be divided in half along the long edge.
Set one half aside to be used later (or to create the bow below) or to create another bow.
STEP 2
Next, fold the other strip in half lengthwise so that 3 to 4 inches of wrapping paper remain on either side of the fold.
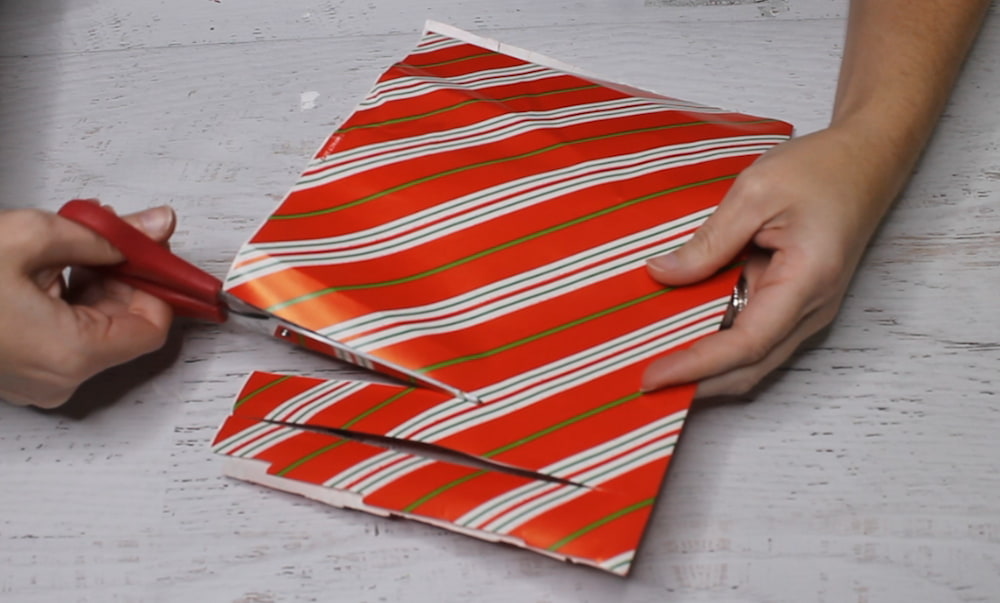
STEP 3
Then, to make a fringe, cut along the folded edge. Do not completely cut through. The paper should still be adhered to the frayed edges.
STEP 4
The last step is to roll the frayed edges together until you reach the end of your fringed strip, then tape it.
STEP 5
You’re all set to go once you fluff your fringe bow.
Curly Bow Out Of Wrapping Paper
Making a curly bow is similar to making a fringe bow, but the finished product is a cascade of curls rather than a bow that resembles a fringed flower.
STEP 1
To begin, cut a strip 6 to 8 inches wide and as long as your roll of wrapping paper, then cut it in half, just as you did for the fringe bow.
Use the second half from the previous half if you still have it and move on to step 2 instead.
STEP 2
Once more, fold the strip in half lengthwise so that there are three to four inches of wrapping paper on either side of the fold.
STEP 3
Trim the paper’s frayed edges with a fringe cutter after folding it. These fringes ought to be wider than they were for the bow you used earlier.
Don’t cut the folded edge, and make them at least 1/2 inch wide.
STEP 4
Now, unfold your paper and use your scissors to curl the fringes inward toward the center. Be patient and discover your rhythm.
I had a good number of pieces break off for me, especially when I started to move too quickly.
STEP 5
Then, secure with tape the folded center of your curly paper by rolling it all the way to the other end.
Conclusion
If I tried to describe how to make this bow in text, I wouldn’t even know where to start. I made the instructional video below for that reason. It’s succinct, to the point, and well worth watching. I made a few bows on the live video today, but this is my favorite. It also includes one of my favorite Christmas songs!! That is all there is to it. This holiday season, up your gift-wrapping game. The best part is that making these adorable little guys requires no additional purchases.
For reading, I’m grateful.